Greenhouse Temperature Sensor and Controller: How to Choose the Right Setup
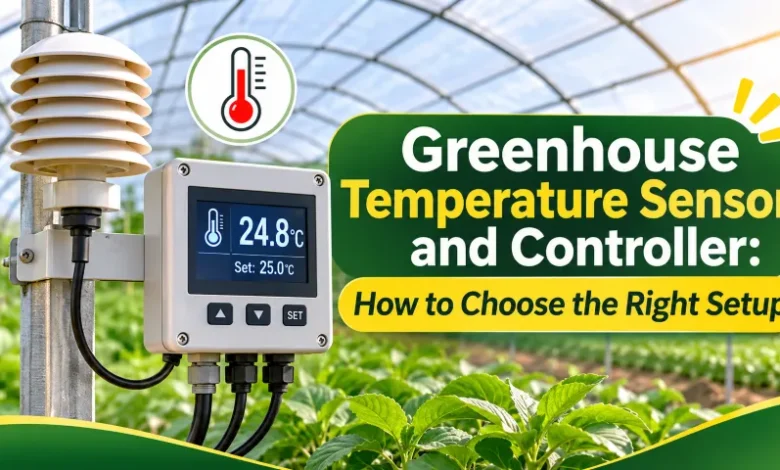
A greenhouse can feel fine by the door while the air around your plants is much hotter. If the sensor reads the wrong spot, even a well-programmed controller opens the vents at the wrong time. Good temperature control starts with one honest reading and equipment that works together.
This guide covers how to choose a greenhouse temperature sensor and controller, where to put the sensor, how to match the controller to your vent drive, what temperatures to aim for, and what to ask a supplier before you buy.
How Greenhouse Temperature Control Works
The control loop is simple:
Sensor reads the air → controller compares it with your settings → vent motor, fan or heater responds → sensor reads the new conditions.
Each part has its own job. A sensor measures. A controller decides. A drive (the motor and gearing) moves the vent. A display that shows temperature doesn’t necessarily run a motor, and some controllers need a separate probe, power supply or motor-control part. Always check what’s included in a quotation.
The design of the greenhouse matters too. Vent size and position, roof shape and covering all change how fast heat builds up and how quickly a controller can pull it back down. If you’re still at the planning stage, our guide to choosing the right greenhouse structure for high-yield farming is a good place to start before you choose any controls.
What Temperature Should You Aim For?
There’s no single correct number. It depends on the crop, its growth stage, and whether it’s day or night. As a rough guide, commonly quoted ranges include:
| Crop | Daytime | Night |
|---|---|---|
| Herbs | 20–25°C (68–77°F) | Slightly cooler |
| Leafy greens | 18–24°C (64–75°F) | Slightly cooler |
| Tomatoes | 21–27°C (70–80°F) | 16–18°C (60–65°F) |
| Cucumbers | 24–27°C (75–80°F) | 18–21°C (65–70°F) |
Treat these as a starting point and check the recommendations for your own variety and region. They are also the numbers your controller needs, so write down your targets before you shop.
Which Measurements Does Your Greenhouse Need?
Air temperature comes first because it drives most ventilation decisions. Add the others only when they help you manage something specific.
| Measurement | What it tells you | What to check before buying |
|---|---|---|
| Air temperature | Heat around the crop | Placement, range, accuracy |
| Relative humidity | Moisture and disease risk | Whether it feeds the control logic or only displays |
| Soil temperature and moisture | Root zone and irrigation | Separate probes and installation depth |
| CO₂ or light | Extra growing-environment data | Extra modules and what you’ll use the data for |
Don’t let soil readings stand in for air readings. They answer different questions.
When you compare greenhouse temperature sensors, look at the measuring range, stated accuracy (many greenhouse sensors fall around ±0.5°C to ±1°C), the output signal, weather and humidity protection, and how easily it can be calibrated. Greenhouses are damp, and cheap household thermometers often drift or fail in constant humidity and irrigation spray. A long list of available parameters doesn’t mean every module is included as standard, so ask for the exact modules in the quoted package.
Where to Install the Temperature Sensor
Put the sensor where it reads the air your plants actually experience.
- Keep it at crop height. Canopy level is where temperature affects the plant most. Move the sensor up as the crop grows.
- Avoid false readings. Direct sun, heaters, cold incoming air, fans and wet surfaces all distort a local reading. Use a shield or ventilated housing suited to the device.
- Don’t choose the spot for easy wiring. The easiest place to reach is often the wrong place to measure.
- Treat zones separately. If one side is sunnier, or crops differ, one sensor per zone is safer than one for the whole structure. One supplier guide suggests roughly one sensor per 1,000–2,000 sq ft in larger houses, though your layout and airflow may change that.
- Check the awkward spots. Doorways, roof peaks and areas near cooling pads often behave differently from the middle of the house.
- Label everything. Note which sensor controls which vent. It saves hours when you troubleshoot.
If you use wireless sensors, check the signal at every planned position before you fix anything in place. Weak signal means gaps in your data.
How to Match a Controller to the Vent Drive
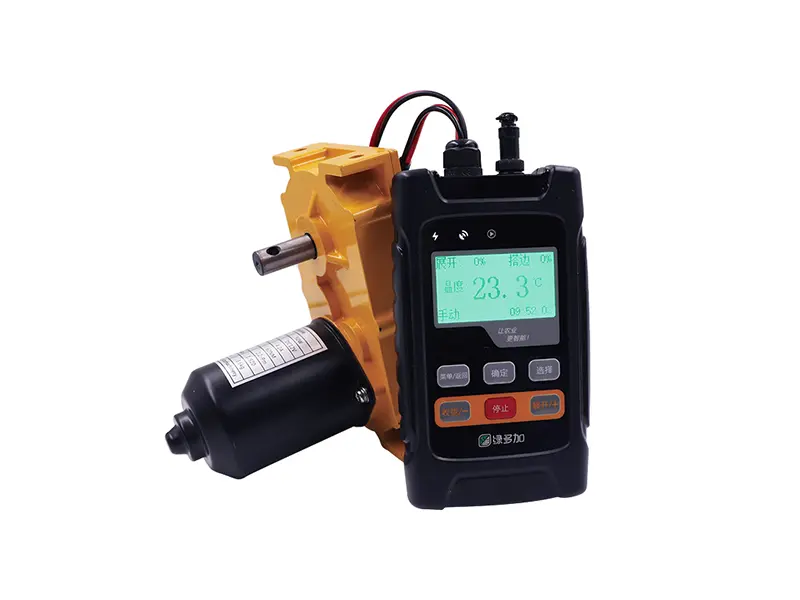
This is where many setups go wrong. Check the drive type, voltage, motor load, control connections and end-of-travel limits together. A controller output can’t be assumed to power any motor directly, so have the wiring and protection specified for your actual mechanism and fitted by a qualified person.
Yantai Sensor’s greenhouse temperature controllers are an example of what to look for. The published specification lists DC12V or DC24V power options, manual or automatic operation, 4G communication and an IP67 rating. The modes include 3-stage and 5-stage segmented operation, matching smart modes and one-touch dehumidification. Use features like these as discussion points against your own greenhouse rather than choosing on the word “smart.”
Before you buy, ask:
- Which modes and accessories come with the quoted model?
- Does the power option match my vent drive?
- If I’m using 4G, is there mobile coverage at my site?
- An IP67 enclosure is a good start, but are the cable entries and connections protected too?
Roof vents are the usual job for the controller, so the roof itself matters as well. Our article on modern farming with greenhouse roof installation shows how roof design affects airflow and heat release.
Set Ventilation Around Your Crop
The right opening and closing points depend on the crop, growth stage, greenhouse design and outdoor weather. Use crop-specific advice for what you grow.
A few settings are worth understanding:
- Staged opening moves the vent in steps instead of snapping fully open, so temperature changes more gradually.
- Different open and close points stop the vent from flipping back and forth when the temperature hovers near the setpoint.
- Dehumidification modes change temperature and humidity together. Check them against outdoor conditions and what your crop tolerates.
- Wind and rain. Strong wind or rain is a good reason to close vents. Ask whether your controller can respond to it or whether you’ll need an extra sensor.
Find out what a mode actually does, including timing and movement limits, before you switch on automatic operation.
Vents Aren’t the Whole Answer
Ventilation is the main tool, but it’s rarely the only one. On hot days, growers also use:
- Shade cloth or reflective film to cut the sunlight (and heat) entering the house.
- Fogging or misting for evaporative cooling, which also raises humidity.
- Air conditioning, precise but expensive, usually only for high-value crops.
In cold weather, heaters and heat-storing materials such as dark water barrels help hold temperature at night.
The greenhouse covering matters here as well. If you’re comparing options, our piece on ways to use ETFE greenhouse film in gardening is worth reading, because the cover changes how much heat enters and leaves. Whatever you add, the controller should be able to run it or at least coordinate with it.
Check Communication, Alerts and Failure Behaviour
If you want an external sensor to talk to a controller, confirm the interface, protocol and data format on both ends. RS485 is a wired interface and 4G is cellular connectivity. They do different jobs, and neither one alone proves two devices can exchange usable data.
Ask these questions too:
- What happens if a sensor fails, the network drops, or power is cut? Find out which settings are kept and how you operate the vents by hand.
- Are there alerts? Some systems send SMS, email or app notifications when temperature goes out of range, but not all do. Don’t assume remote access includes alarms.
- Is data logged? A history of readings helps you tune settings and spot problems. Ask whether data is stored locally if the connection drops.
- Is there backup power or a safe default position? Only count on these if they’re documented for your configuration.
Calibration and Maintenance
Sensors drift over time, especially in damp conditions. Compare your sensor against a trusted reference thermometer at commissioning, then check it periodically (at least once a year is a sensible habit). Keep housings clean and keep a simple record of settings, tests and any adjustments.
Start With One Ventilation Zone
If you’re new to automation, don’t automate everything at once. Pick one independently operated vent zone and:
- Choose a representative air-sensing position at crop height.
- Document the existing drive, power supply and control connection.
- Agree the operating logic and travel limits.
- Confirm what’s included: sensor, controller, drive, power supply and communications.
At commissioning, test opening and closing, confirm the vent stops at its limits, and try manual operation. Once that zone behaves well, copy the approach to the next one. This also scales naturally if you later move toward larger operations; our overview of commercial greenhouse farming looks at where that road can lead.
Checklist Before Asking for a Quote
A written specification gets you a far better quote than “send me your best greenhouse controller.” Prepare:
- Greenhouse size, crop type and number of independently controlled zones
- Vent mechanism, drive voltage and motor details
- Measurements needed and proposed sensor locations
- Available power, mobile coverage or other communications
- Required modes, manual control, alerts and fault response
- A clear split between included equipment, optional extras and installation
Frequently Asked Questions
Can a temperature sensor open a vent by itself?
No. A sensing-only device measures and reports. Moving a vent needs control logic plus a compatible motor or drive. Some products combine these functions, so check the exact model.
Where should I put the temperature sensor in a greenhouse?
At crop height, shielded from direct sun and away from heaters, fans and wet surfaces. In larger or mixed houses, use more than one position.
Can one sensor control a whole greenhouse?
Sometimes, if its location truly represents the whole space. If you have different zones, exposures or crops, add sensing points.
Are 4G and RS485 the same thing?
No. 4G is cellular connectivity and RS485 is a wired interface. A system may use either or both. Confirm the protocol and setup for your equipment.
What temperature should trigger ventilation?
It depends on your crop, growth stage and conditions. Work from a crop-specific plan and check how the controller applies opening, closing and staged settings.
How do I know if my sensor is failing?
Look for sudden spikes or drops that don’t match the real conditions, or readings that differ from a reference thermometer. Replace or recalibrate it, and don’t leave automatic vents running on a suspect reading.
Can I use my phone as a sensor?
No. A phone can show live data and alerts from a real sensor, but it can’t measure greenhouse air itself.
About Yantai Sensor
Yantai Sensor is a manufacturer and supplier of smart weather and environmental monitoring equipment, based in Handan, Hebei, China. Its range covers weather stations, agricultural sensors, and greenhouse monitoring and control products. The company combines production with research and development, testing and quality control, and offers product selection and technical advice through its website. For greenhouse projects, you can talk through measurement needs, installation methods, power arrangements and system integration before choosing a configuration.
Planning a Greenhouse Project? Get in Touch
Whether you’re building a new greenhouse or upgrading your ventilation, send Yantai Sensor your greenhouse dimensions, crop type, vent-drive details, available power and the measurements you need. Mention any existing controller or communication requirements so they can suggest a suitable setup and prepare a quotation.
Email: [email protected]
WhatsApp / Tel: +86 17733075106